Whether you are securing a kayak to a roof rack, lashing down a cooler in a pickup bed, or restraining furniture inside a trailer, cam‑buckle tie‑down straps with hooks are a go‑to hand‑operated cargo‑securing solution. Unlike ratchet straps, they generate tension purely by hand pull, making them ideal for loads where excessive force could crack, dent, or crush cargo. This field‑oriented guide walks through correct selection, installation, common field failures, regulatory notes, and maintenance best practices.
Key Takeaways
‑ Select straps whose Working Load Limit (WLL) exceeds the anticipated applied load, following published safety‑factor standards.
‑ Thread webbing fully through the cam‑buckle mechanism; pull smooth, steady hand tension and confirm positive cam lock.
‑ Secure loose webbing tails to eliminate wind flutter. Prevent twists, which degrade strap strength.
‑ Complete pre‑use visual inspection of webbing, buckles, and hooks before every deployment. Never exceed marked WLL.
‑ For highway transport, comply with applicable cargo‑securement rules (e.g., FMCSA for highway‑travelling commercial loads).
Cam‑Buckle Straps with Hooks: Overview
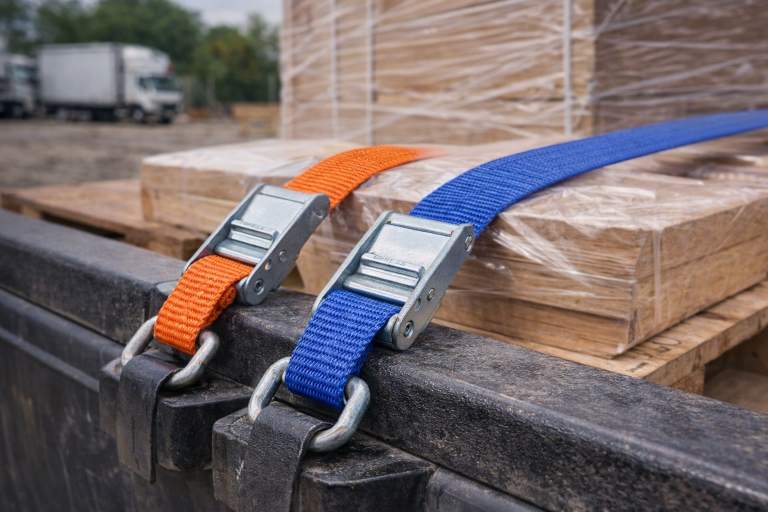
Cam‑buckle tie‑down straps rely on a spring‑loaded cam jaw to grip woven webbing. All tightening is done manually, with no ratcheting hardware. This characteristic makes them best suited for light‑to‑moderate cargo, such as recreational gear, household goods, and fragile items where over‑clamping must be avoided. Common real‑world uses include roof‑mounted watercraft, pickup‑bed coolers, and furniture hauling.
Strap Component Breakdown
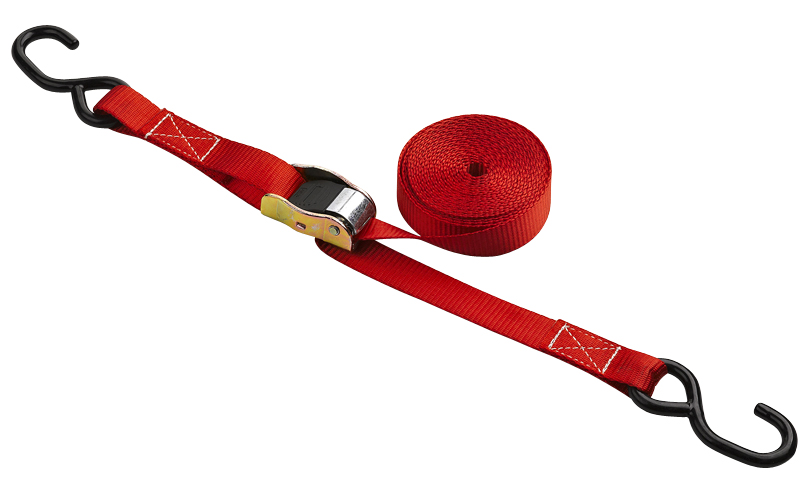
- Polyester webbing: Most hook‑ended cam‑buckle straps use 1‑inch width polyester webbing. Polyester resists abrasion, UV degradation, and moisture far better than nylon in prolonged outdoor exposure. Webbing carries printed critical markings: Working Load Limit, assembly part number, and applicable industry standard.
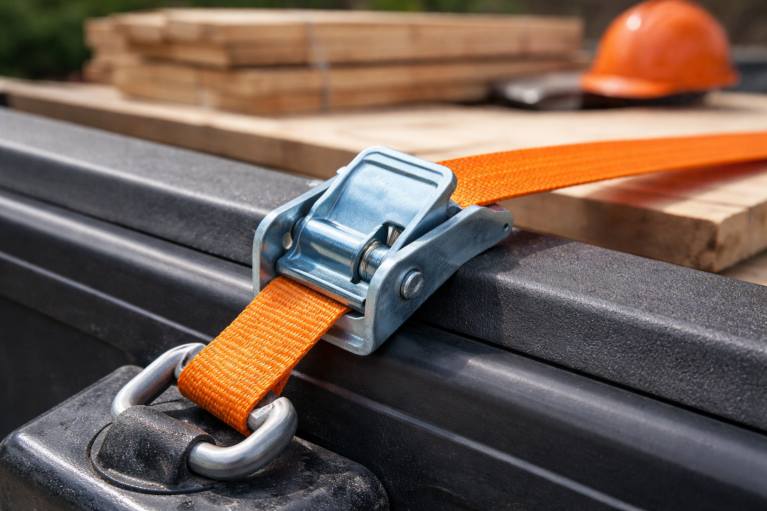
- Cam‑buckle assembly: A spring‑loaded metal cam jaw inside the buckle bites onto webbing to hold tension. Most production hardware receives zinc‑plating to resist surface rust. A thumb‑actuated release lever opens the cam to feed or release webbing.
- Steel hooks: Formed steel hooks connect the strap to vehicle anchor points, D‑rings, or trailer mounting hardware. Hooks must engage fully; partial engagement creates a risk of hook dislodgement under road vibration. For paint‑sensitive surfaces, many users bypass hooks and perform a soft‑tie wrap directly around structural framing.
Note: Values above represent common industry‑spec sample figures. Always refer to the printed marking on your actual strap assembly rather than generic table values.
How the Cam‑Buckle Mechanism Functions
When you depress the thumb release lever, the spring‑loaded cam jaw lifts open, permitting free movement of the webbing. Feed the loose webbing tail through the buckle and apply steady hand‑pull tension. Release the lever; spring force drives the cam teeth to bite firmly against the webbing, locking in tension. To unfasten, press the release lever again and pull the webbing free.
Critical practical nuance: cam‑buckle holding performance depends entirely on correct threading. Twisted webbing reduces cam‑jaw contact area and can allow slip under shock or vibration. These assemblies cannot produce the high mechanical advantage of ratchet‑style straps, so they are not intended for heavy‑duty high‑tension lashing.
Step‑by‑Step Deployment Workflow
Step 1: Choose the Correct Strap for Your Load
Two primary parameters govern strap selection: rated Working Load Limit and usable strap length.
The Working Load Limit (WLL) is the maximum safe working load for real‑world transport, factoring in road shock, vibration, and dynamic G‑forces. Most tie‑down assemblies follow a 3:1 design safety factor: Minimum Breaking Strength ÷ 3 yields the nominal WLL. Do not calculate WLL from arbitrary breaking‑strength numbers you find online; always use the manufacturer‑printed WLL label on the physical strap. Generic internet formulas are for conceptual understanding only.
For highway cargo securement under FMCSA rules, the aggregate combined WLL of all tie‑downs must equal at least 50 % of the total cargo weight. For recreational non‑commercial hauling, industry best practice recommends selecting straps whose individual or combined WLL comfortably exceeds your cargo weight, building in safety margin for bumpy road conditions.
Length selection: measure the path from anchor point, across cargo, to the opposing anchor. Add extra length for wrapping and threading through the buckle. Too‑short straps create dangerous pre‑stress; excessively long straps leave large loose tails that flutter at highway speed, causing abrasion, noise, or whipping hazards.
Step 2: Engage Hooks to Suitable Anchor Points
Position your cargo evenly across the vehicle or trailer bed first. Attach steel hooks only to rigid, load‑rated anchor hardware: factory D‑rings, truck‑bed tie‑down cleats, or trailer frame mounting points.
Avoid hooking onto thin sheet‑metal body panels, plastic trim, movable parts, or sharp bare edges. Sharp edges will saw through webbing under road vibration. Where sharp edges cannot be avoided, use edge protectors or sleeve padding.
Ensure hooks are fully seated in their mounting points. Confirm hook orientation so vibration cannot work the hook free. If painted or finished surfaces risk scratching, skip the hooks and use a soft‑tie wrap around solid structural members.
Step 3: Properly Thread the Cam Buckle
Improper threading is one of the top reasons for in‑transit strap slippage.
- Flip the buckle so the bottom feed slot faces upward.
- Press and hold the thumb release lever to lift the cam jaw fully open.
- Feed the free tail of the webbing upward through the bottom‑entry slot of the buckle. Leave roughly 6 in of loose tail extending out the buckle outlet.
- Keep holding the release lever, and pull the loose tail to take slack out of the strap and bring the strap snug against cargo.
- Release the thumb lever; the spring‑loaded cam will drop onto the webbing and lock tension in place.
Pull webbing with smooth, steady force. Abrupt jerking can deform cam teeth or fray webbing fibres.
Step 4: Set Tension and Manage Loose Webbing Tail
Pull hand tension until the cargo sits firmly without shifting. Cam‑buckle straps rely on human hand strength; you cannot generate ratchet‑level clamping force. Stop once snug; over‑aggressive pulling will not improve security and may damage webbing or buckle components.
Confirm the webbing lies completely flat, with zero twists. Twists concentrate stress and lower effective strap strength. Tuck the leftover loose tail underneath the tightened webbing loop, or use a built‑in strap keeper. This eliminates wind flutter, prevents tail whipping, and avoids abrasion damage during travel. You can readjust tension anytime: press the thumb release, re‑pull webbing, and release to re‑lock.
Step 5: Final Pre‑Drive Verification
Before pulling onto public roads, perform a full visual check:
- Tug firmly on each strap to verify positive lock; no slipping should occur.
- Confirm every hook remains fully seated and cannot pop free.
- Inspect for webbing twists, cuts, fraying, or damaged buckle hardware. Discard any compromised assemblies.
- Confirm loose tails are secured.
- After driving the first 8‑15 miles, stop and re‑inspect. Cargo can settle, reducing strap tension after initial road vibration. Re‑snug straps as needed.
Practical Real‑World Applications
Securing Outdoor Recreational Gear
Cam‑buckle straps excel for roof‑mounted watercraft: kayaks, canoes, paddleboards, and surfboards. Place two straps across the hull, aligned with roof‑rack crossbars. Orient buckles toward the side of the hull so hard metal hardware does not press into and dent deck surfaces. Hand‑tighten only enough to hold the craft stable. For highway‑speed kayak transport, supplement cam‑buckle side straps with separate bow and stern safety lines to the vehicle front and rear anchor points.
Cam‑buckle low hand‑applied tension is well‑suited for foam‑cored and fibreglass boards, which risk crushing or cracking under ratchet‑strap high force. They are also widely used for rooftop luggage and soft‑sided bags.
Pickup‑Bed and Trailer Hauling
Use hook‑end cam straps for coolers, lawn equipment, furniture, and household goods inside pickup beds. Connect hooks to factory bed D‑rings and cleats. Compared with bungee cords, cam‑buckle straps maintain consistent restraint and do not stretch under dynamic load.
For larger trailer‑hauled items, deploy multiple tie‑down points. A general practical guideline: use at minimum four independent tie‑down paths for substantial‑size cargo. Always anchor to load‑rated frame points; never rely on thin cosmetic body panels. Pad any sharp edges that contact webbing. Stop and re‑check tension after initial miles of travel as loads shift and settle. Zinc‑plated hardware delivers reasonable corrosion resistance for marine and outdoor use, though periodic inspection for surface rust remains necessary.
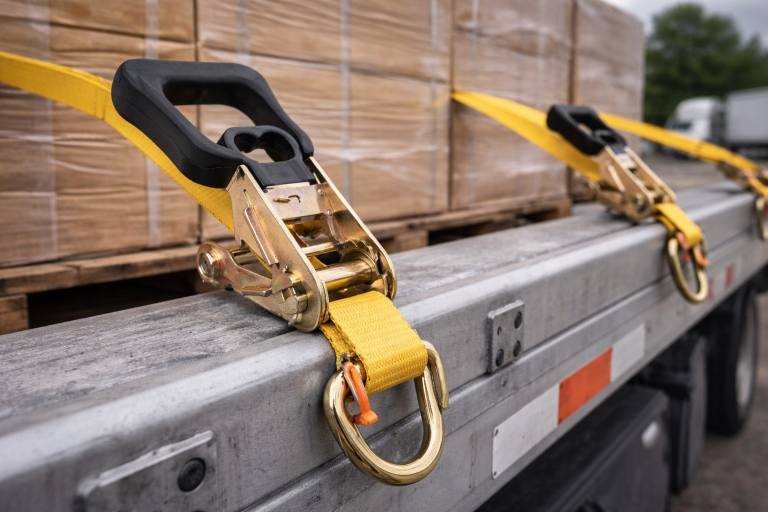
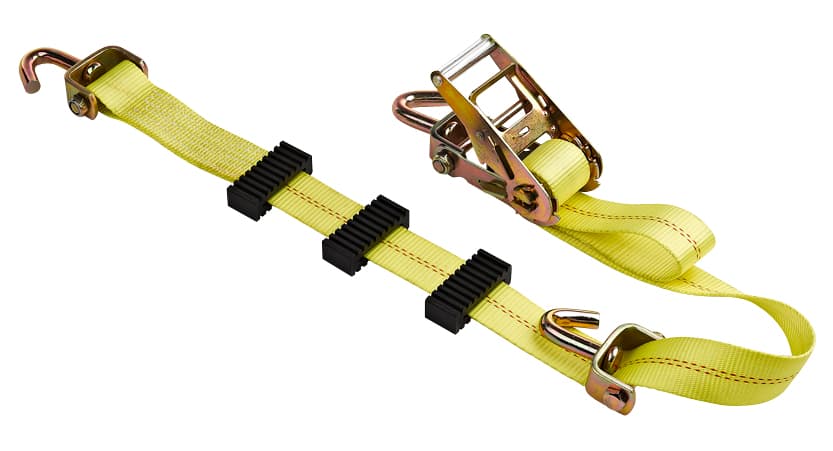
Cam‑Buckle Straps vs Ratchet Straps
Each tie‑down style fills a distinct role in cargo securement.
| Aspect | Cam‑Buckle Strap with Hooks | Ratchet Strap |
|---|---|---|
| Typical WLL | Up to ~330 lbs (1‑in webbing) | Up to ~1 600 lbs (2‑in webbing) |
| Tension source | Hand‑pull only, no mechanical advantage | Ratchet mechanism provides mechanical leverage |
| Operation speed | Fast, simple, tool‑free | More steps required for ratchet winding |
| Over‑tightening risk | Low; limited by human hand strength | High; can crush or deform cargo |
| Best‑fit use‑cases | Light‑moderate, fragile, recreational cargo | Heavy‑weight, dense loads requiring high clamping force |
Guidance: When your load exceeds the cam‑strap rated WLL, select ratchet‑strap assemblies. Ratchet straps deliver far higher clamping force but require careful technique to avoid damaging delicate cargo.
Safety, Inspection & Maintenance Best Practices
Understand Working Load Limit and Safety Factor
The Working Load Limit (WLL) is the maximum intended load for normal service. It is derived from Minimum Breaking Strength with a published safety factor (commonly 3:1 for many tie‑down standards such as WSTDA T‑1). Breaking‑strength figures represent destructive lab‑test failure points and are never intended as real‑world operating limits.
Always read the printed marking tag on your strap assembly. Do not rely on generic online tables for your actual gear. Commercial operators must follow FMCSA cargo‑securement regulations; recreational users should build in extra safety margin for bumpy roads, potholes, and emergency‑stop dynamic loads.
Pre‑Use Inspection Checklist (every trip)
- Webbing: look for cuts, deep abrasions, frayed edges, UV brittleness, chemical staining, or heat‑melted fibres.
- Cam‑buckle: verify the release lever functions smoothly; inspect cam teeth for wear, burrs, bending, or cracks.
- Hooks: check for bending, cracks, or significant rust.
- Threading: confirm webbing feeds correctly with no twists.
Retire and discard any strap assembly showing damage. Damaged straps cannot be reliably repaired in the field.
Operational do‑and‑don’t summary
✅ Apply smooth, steady hand tension; snug the load, do not over‑force.
✅ Secure loose webbing tails to stop wind flutter.
✅ Use edge padding around sharp contact surfaces.
✅ Re‑inspect tie‑downs after the first few miles of driving.
❌ Do not exceed the strap assembly’s marked WLL.
❌ Do not hook onto thin sheet‑metal, plastic trim, or moving components.
❌ Do not use twisted webbing.
❌ Do not rely on cam‑buckle straps for heavy loads beyond their rated capacity.
Final Summary
Safe use of hook‑style cam‑buckle straps begins with selecting appropriately rated hardware, attaching hooks to structurally sound anchor points, correctly threading the cam‑buckle mechanism, applying firm hand tension, and securing excess webbing tails. Pre‑trip visual inspection and early‑trip re‑checks are critical field habits. Cam‑buckle straps excel for light‑to‑moderate cargo where high clamping force could damage items; switch to properly‑rated ratchet‑strap assemblies for heavier loads. Always defer to the manufacturer’s printed markings and applicable local transport‑safety regulations.