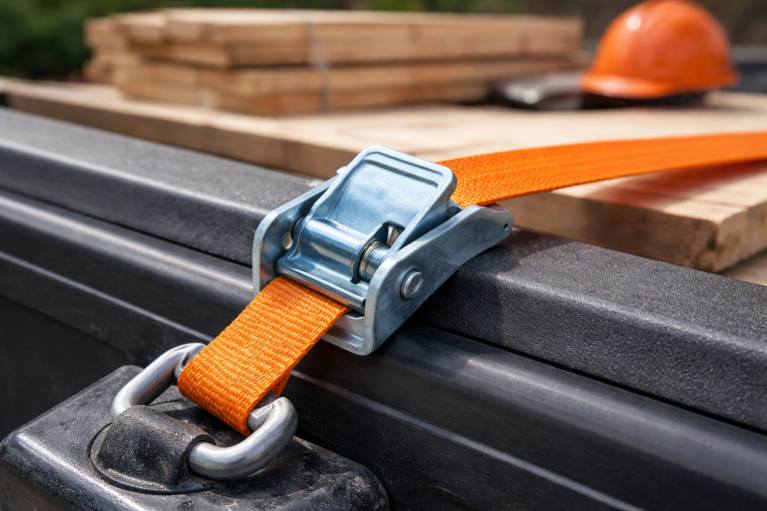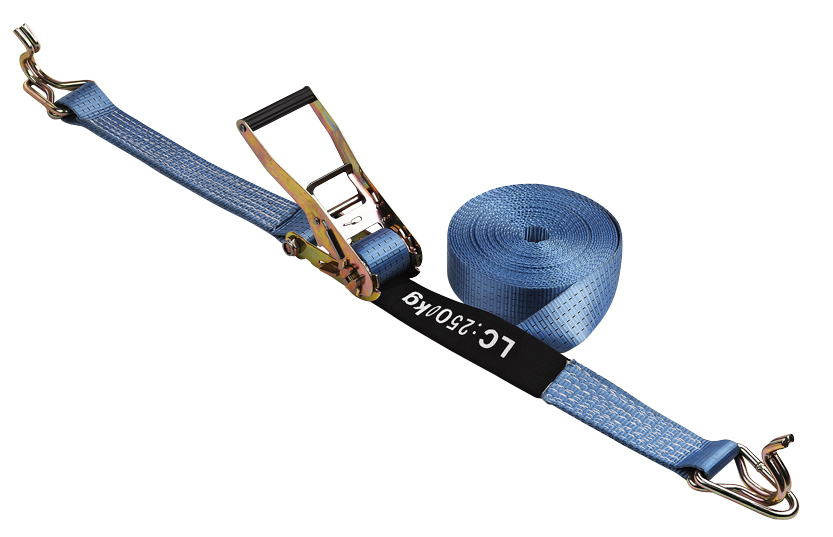
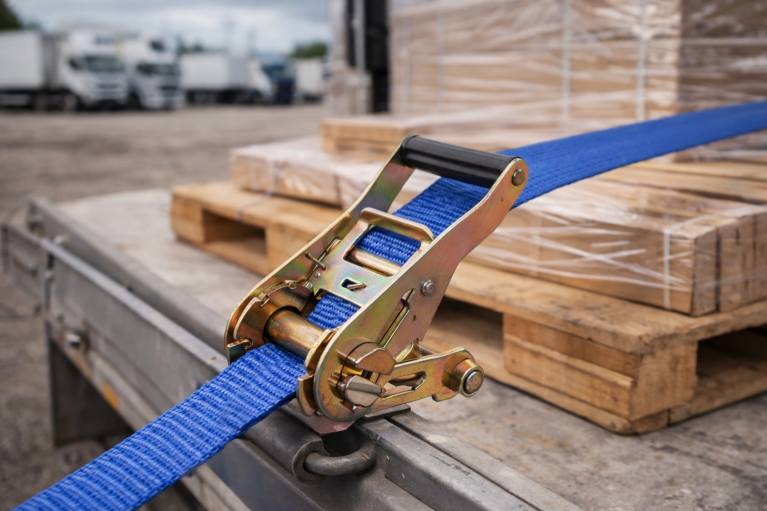
A hookless ratchet strap holds cargo with loops, D-rings, or an endless webbing loop instead of metal hooks, which is why users often call it an endless ratchet strap. The webbing threads through an anchor point or back through the ratchet itself, so no open hook touches the frame and paint or chrome stays protected.One endless strap can wrap a bundle, pass through its own loop, and pull tight, with tension holding without metal contact. A standard ratchet strap with hooks still suits open anchor points, while cam buckle straps remain a fit for lighter loads.
nbby1’s ratchet straps take this further, combining endless webbing loops, D-ring fittings, and hook fittings within working load limits from 500 to 10000 lbs.This guide walks through each step in order, from choosing the strap to checking tension.
Key Takeaways
- Pick a hookless strap that matches your anchor point, like a lasso strap for a wheel or an axle strap for a frame rail.
- Attach the strap by looping it through a D-ring, rail, or quick link, or wrap it around the load and feed it back through the ratchet.
- Thread the webbing flat into the ratchet slot to avoid twists and jams, and never tie knots in the strap.
- Tighten with short strokes until the strap feels snug, then lock the handle down and recheck tension during transit.
- Hookless straps protect painted surfaces because no metal hooks touch the frame, and they work well for bundling cargo.
Pick the Right Ratchet Straps
Hookless and Endless Ratchet Strap Types
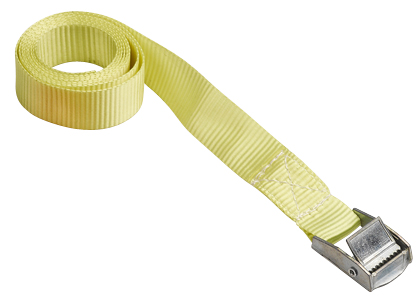
Hookless straps also carry the name endless loop ratchet straps. The design lets the webbing loop, wrap, or anchor directly onto a secure point. An endless ratchet strap forms a closed loop when its free end feeds back into the ratchet. US Cargo Control describes this style as a tool for bundling large or small items on pallets, moving dollies, and crates. A lasso or soft-loop strap works the same way around a wheel or axle, and no metal touches the rim. R1 Industries notes that a lasso strap needs a ratchet or cam buckle paired with it to build tension.
Common jobs fit this family well. Crews bundle cargo, secure motorcycles, and control general loads. A hook-style ratchet strap still fits open anchor points where a quick attachment saves time. Each type has its place.
Matching Straps to Anchor Points
The anchor point decides the strap choice. A wheel or trailer anchor point suits a lasso or soft-loop strap. An axle or frame rail suits an axle strap that loops around a solid mounting point. The table below summarizes the match.
| Anchor point | Compatible hookless strap | Load note |
|---|---|---|
| Wheel | Lasso/soft-loop strap | Needs a ratchet or cam buckle for tension |
| Axle or frame rail | Axle strap | Requires an accessible axle or frame rail |
| Trailer anchor points | Lasso/soft-loop strap | Works with limited anchor points |
Capacity matters as much as fit. Federal cargo securement rules in 49 CFR 393.106 require the combined working load limit of tie-downs to equal at least 50 percent of the cargo weight, with a minimum of two tie-downs. A typical 2-inch ratchet strap rated at 1,467 lbs working load and 6,000 lbs break strength, as listed by Hi-Tech Alarms, clears that threshold on many loads. Four anchor points, one per corner, give the best control. One endless ratchet strap can also wrap a bundle and fasten to itself, which removes the need for a hook at either end.
Attach the ratchet straps to the Anchor
Looping Through D-Rings and Rails
A D-ring or a rail gives the webbing a clean path. Pass the free end of the strap through the ring, then bring it back toward the ratchet. The ring carries the load, and the webbing slides without rubbing on bare metal. A closed D-ring works best because the loop cannot slip off during transit. Trailer rails accept the same method. Route the webbing around the rail and keep it flat against the surface. KNKT advises users to inspect the strap and ratchet for cuts, fraying, damaged stitching, or bent components before use. A damaged strap should stay in the toolbox.
Pallet work follows a similar path. US Cargo Control recommends that workers feed the strap through the bottom of the pallet, keeping the webbing in line with the fork tines. This routing protects the webbing from the tines and keeps the endless ratchet strap clear of the lifting path. The same source notes that corner protectors help when cardboard boxes or fragile cargo might cave in under tension. A soft-loop tie-down around a wheel or axle follows the same principle. The loop wraps the anchor, and no metal touches the rim.
Anchoring a Strap to Itself
Some loads offer no ring, rail, or frame point. A quick link solves this problem. The user opens the link, passes it through the end loop of the ratchet strap, and closes it around a solid member or back through the strap’s own loop. The quick link then acts as the anchor, and the ratchet strap pulls against it. This setup keeps the connection closed and lets the user anchor a strap to itself when no other point exists.
An endless ratchet strap handles bundle work without any hardware at all. The user wraps the webbing around the bundle, feeds the free end through the ratchet, and tightens. The closed loop holds the bundle, and no hook or link is needed. US Cargo Control describes this wrap-and-fasten method as the core job of the endless design. One strap can bundle lumber, pipe, or a stack of cartons. The user then locks the handle and tucks the loose webbing so it cannot flap. A hook-style strap still fits open anchor points, but the endless design shines where the load itself is the anchor.
Threading a Ratchet Strap Correctly
Feeding the Strap Into the Ratchet
Correct threading decides how well the whole system holds. A worker starts by opening the ratchet handle until it lies flat. Strapinno describes this first move as opening the ratchet all the way, which exposes the center spindle slot. The user then takes the loose end of the webbing and feeds it through the slot in the center spindle. A firm pull brings the tail back toward the body. Tightness does not matter at this stage. The goal is a clean path for the webbing onto the mandrel take up spool.
Vulcan Brands lists improper threading as a common mistake with a clear cost. The table below shows the problem and the fix.
| Common Mistake | Consequence | Prevention |
|---|---|---|
| Improper Threading | Reduced strap effectiveness | Thread strap correctly through ratchet |
A misrouted strap cannot build full tension. The load may shift in transit. The remedy is simple: thread the ratchet strap through the ratchet exactly as the manufacturer directs, then test the grip before adding tension.
The same care applies to an endless ratchet strap. The free end passes through the ratchet and back toward the anchor. Users who thread the ratchet strap with attention to the slot position avoid most problems later. A few seconds of care at this stage saves a roadside redo.
Avoiding Twists and Jams
Flat webbing carries load evenly. A twisted strap concentrates force on one edge and weakens the assembly. Tent and Table advises workers to pull the entire length of webbing flat through the hand before threading it into the ratchet slot. This single habit removes most twists before they reach the drum.
Several other habits keep the mechanism clean. Tent and Table offers these practical rules:
- Never tie knots in commercial ratchet straps to change length; use proper shortening hardware or move the anchor stake instead.
- Keep the webbing centered in the spool slot, away from the inner side plates of the ratchet assembly.
- Train new crew members on clean threading technique using a detailed operational guide.
Jams follow predictable causes. Strapinno notes that wrong threading causes jams, and overfeeding slack can lock the drum. Long straps tangle when loose tails go unchecked. Workers should wrap extra webbing neatly during use, or tuck it under the strap run, and never let it drag. Retractable designs wind the webbing into a housing like a seatbelt, which cuts tangling and jamming risk.
A final check closes the step. The user opens the ratchet, confirms a flat run of webbing, and gives the tail a short pull. Smooth movement means the strap is ready for tension. Any bind means backing out and starting again. Careful threading a ratchet strap takes little time and protects both cargo and hardware.
Tighten ratchet straps and Secure the Load
Working the Ratchet Handle
The handle supplies the leverage. Mac’s Custom Tie Downs breaks the mechanism into four parts: the handle, the axle, the release, and the slot. The webbing wraps the axle, and the slot holds the webbing on that axis. A worker grips the handle and cranks in short strokes. Each stroke pulls webbing onto the spool and takes up slack. Short strokes beat long ones, because the ratchet teeth engage cleanly and the load moves in small steps.
Before tightening a ratchet strap, inspect the tool. USA Ratchet advises checking the metal housing and handle for bending, cracking, or deformation. The spool should rotate smoothly and stay free of debris. The webbing itself needs a look for cuts, fraying, or weak points, since a compromised strap can snap under tension. A damaged unit goes back in the box.
Locking In and Checking Tension
Tension should feel snug, not maximal. Mac’s Custom Tie Downs warns against over-tightening, which can damage both the strap and the cargo. Tent and Table describes the target as webbing that is taut and springy to the touch, without visibly bending frame poles or pulling anchor patches out of alignment. Crews should feel for firm resistance instead of using maximum leverage on the handle.
Locking a ratchet strap happens when the handle closes flat against the housing and the pawl drops into a tooth. To loosen the strap later, the user lifts the release catch. Holding down the release lever opens the pawl, and the webbing pulls free. Two habits protect the load. First, balance tension across opposing sides rather than fully cranking one corner. Second, recheck tension during transit, because vibration, temperature swings, and shifting cargo all affect it. To release the ratchet strap at the end of a run, hold down the release lever and unwind slowly. Fold the webbing neatly afterward to prevent twists and kinks.
Hookless ratchet straps follow a clear sequence. A user picks the right strap for the anchor point, attaches it through a D-ring, rail, or quick link, threads the webbing flat into the ratchet, tightens with short strokes, and locks the handle down. An endless ratchet strap skips the hook entirely and wraps the load itself. These ratchet straps protect painted surfaces because no metal hooks touch the frame. A standard ratchet strap with a hook still fits open anchor points. Users should recheck tension during transit and add corner protectors on fragile cargo. With the right anchor points, hookless straps are easy to use safely.