If your ratchet strap is tangled, jammed, or stuck, you can usually fix it in a few minutes without buying a new one. The three most common failures are twisted webbing, a release lever that will not pull, and a jammed ratchet mechanism. All three are familiar problems for anyone who hauls cargo.
Anyone can learn how to fix a ratchet strap with basic tools and a flat surface. A small screwdriver, pliers, and work gloves complete this repair. The process is safe when the strap is tested afterward. Once the webbing lies flat and the lever moves freely, the strap works again. Fixing a small jam early prevents a bigger problem later.
Key Takeaways
- Place the ratchet strap on a flat surface. Inspect the release lever. Inspect the webbing. Find the exact failure point. Each jam needs a distinct fix.
- Gather simple tools first. Simple tools handle most repairs: screwdrivers, pliers, work gloves, dry lubricant. Clean the ratchet buckle. Do not force the handle.
- Release the tension first. Pull the webbing backward. Rewind the strap flat. Keep the webbing centered. Leave 2-4 wraps on the spool.
- Clean the ratchet teeth. Work the release lever gently. Reset the pawl spring. Replace a broken spring. Reassemble the ratchet. Test the lock.
- Test the strap under light tension. Confirm the handle clicks evenly. Store the strap clean, dry, untangled. Replace damaged webbing.
Identify the Problem With Your Ratchet Strap

Before fixing a stuck ratchet strap, the user must find the exact failure point. A quick inspection separates a simple tangle from a broken ratchet mechanism. This step saves time and guides the repair.
Check the Strap for Twists and Tangles
Lay the strap on a flat surface. Run a hand along the webbing from the hook to the spool. A twisted ratchet strap shows folds, twists, or misalignment at the mandrel slot. The winding becomes uneven and bunches against one side plate. These signs appear before the strap jams completely. Catching them early makes the job simple.
An overwound spool presents a different problem. More than 2-4 full wraps of webbing fill the housing. The excess layers bind the mandrel against the side frame. Tightening or release becomes blocked. The table below compares twisted ratchet strap webbing with an overwound spool.
| Factor | Twisted webbing | Overwound spool |
|---|---|---|
| Primary location | Twists or folds at the mandrel slot; winding bunches against one side plate. | Spool overfills the housing; excess layers bind the mandrel. |
| Observable effect | Uneven tension; jams occur inside the mandrel. | More than 2-4 wraps; housing overflows; release is blocked. |
| Cause and remedy | Strap not laid flat; remove twists and rewind. | Cranked with slack; release tension, pull the tail back, keep 2-4 wraps. |
Test the Release Lever and Handle
Test the release lever first. Pull the lever toward the handle while holding the strap steady. A healthy unit opens freely and moves without resistance. If the lever will not move, the ratchet is stuck. Dirt, rust, or a misaligned pawl often causes the jam. Do not force the lever. Forcing it may bend the metal.
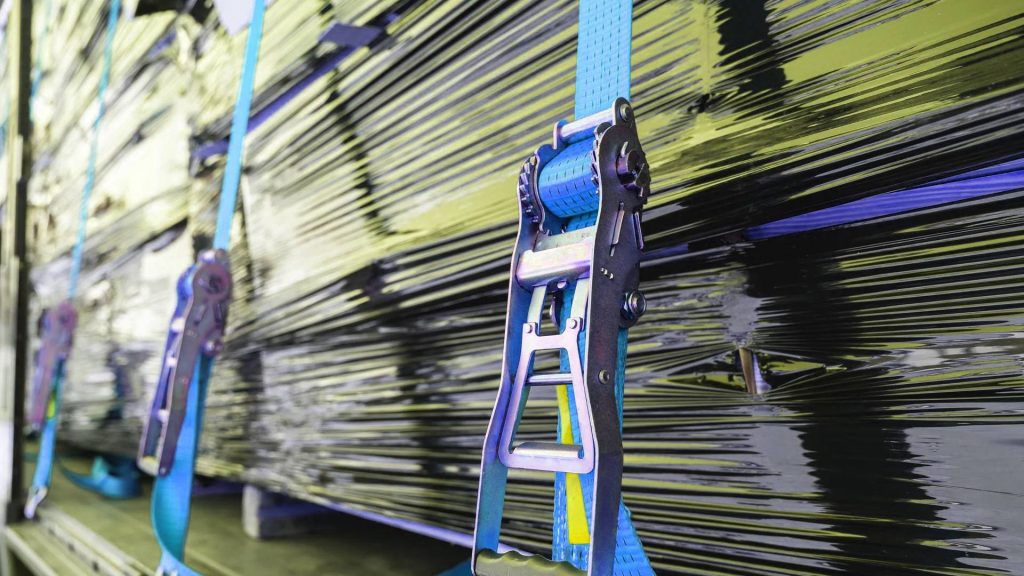
Next, turn the handle forward and backward. A smooth ratchet mechanism clicks evenly as the teeth engage. If the handle catches or grinds, the pawl has caught in the teeth. Then inspect the ratchet and strap closely. Determine whether the ratchet is damaged or rusty. A rusty pawl requires cleaning. A broken spring needs replacement. The user may need to loosen the webbing to reach the hardware. Identify these issues before disassembly.
Gather Tools to Fix a Ratchet Strap
The right tools make this job quick. Most broken units need only a few household items, not a trip to the hardware store. Users can repair a ratchet strap without replacing any parts. A modest toolkit solves twisted webbing, stuck levers, and jammed gears.
Use a Screwdriver, Pliers, and Work Gloves
A user should gather these tools before touching the mechanism. The basic hand tools include:
- Lubricant such as WD-40 loosens rusted or stuck components.
- Needle-nose pliers grip small parts inside the mechanism.
- Cleaning cloth wipes away dirt, debris, and excess lubricant.
- Small screwdriver pries the manual pawl away from the ratchet teeth.
Work gloves shield hands from sharp edges and pinched fingers. A small screwdriver often pries the release lever best. Users should keep each tool within reach before beginning this repair. They can lay the tools beside the strap in the order they will be used. Pliers usually serve for springs, while the screwdriver handles the pawl.
Set Up a Flat, Well-Lit Work Area
A stable table or workbench offers the best surface. Users spread newspaper beneath the strap to catch falling dirt. Good lighting reveals small details, such as a bent pawl spring or a grain of sand in the gear teeth. They position the ratchet facing upward so the side plates remain visible. A clean table prevents parts from rolling away. The work area needs enough room to swing the handle fully open. Loose cords and small children belong away from the workspace.
The user cleans the outside of the mechanism first. They wipe away dust and road grime with the cloth. Grime inside the housing can cause a new jam after the repair. Even a well-made tie-down strap can jam when dirt or over-winding builds up in the mechanism. A clean workspace and a careful inspection reduce the chance of repeated failure. Users examine the gear teeth with a bright light. A dentist-style mirror can reveal hidden damage. Users read the working load limit on the label before testing.
How to Fix a Ratchet Strap That Tangles
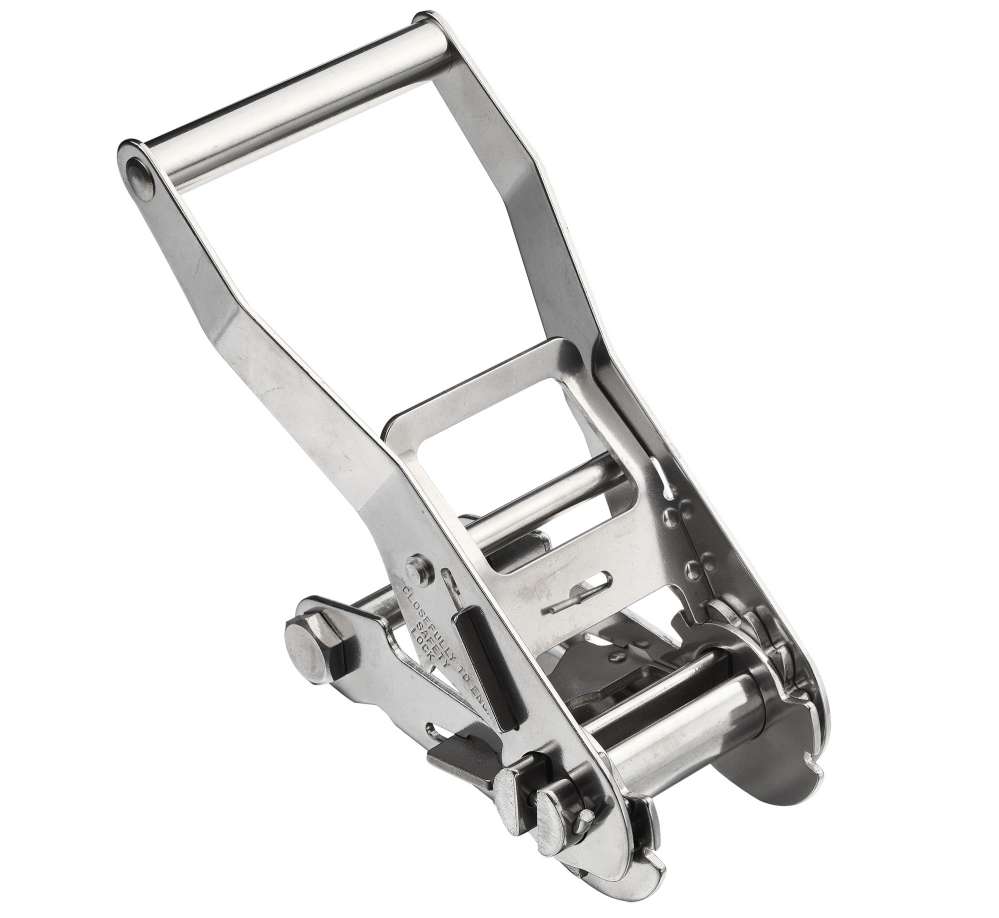
A tangle in a ratchet strap usually starts at the spool. Webbing folds over itself and bunches against one side plate. The ratchet mechanism then binds and will not turn. This guide shows how to fix a ratchet strap that tangles around the spool. These steps take only a few minutes.
Release the Strap and Remove Slack
The first step is to release the tension on the ratchet. Never force a loaded handle. The handle can snap back and cause injury. If the strap still holds cargo, the operator kneels on the cargo or places weight on the bar. This action removes load so the lever can move.
A user should release any tension in the webbing before starting the repair. Work gloves protect hands from sharp edges. A well-lit area reveals debris inside the gear teeth. The operator cleans the teeth with an old cloth or a small brush. Dirt in the mechanism can block the release catch.
The release sequence has four steps:
- Find the spring-loaded release latch inside the main handle.
- Squeeze the release tab toward the outer handle and hold it. This pulls the handle pawl out of the gear teeth.
- Rotate the handle until it lies flat at a 180-degree line with the base frame. The handle’s cam then pushes both pawls away from the gear teeth. A distinct click signals the release of spool tension.
- Hold the ratchet body and pull the webbing backward out of the mandrel slot. The spool spins freely, so the strap slides out easily.
Fixing a ratchet strap often needs one extra tool. Overwound with too much webbing, the spool may bind the release catch against the teeth. Even a strap fresh from the factory can jam this way. The operator can loosen the strap by gently prying the manual pawl release catch with a small screwdriver. Never force the handle. Forcing it bends the metal.
Rewind the Webbing Flat and Smooth
After release, no slack should remain. The user pulls the webbing through the mandrel slot until the strap is completely taut. Leaving slack lets webbing fill the spool cavity and jam the ratchet mechanism.
The spool needs 2 to 4 full wraps. Too few wraps cause slipping. Too many wraps jam the mechanism. If the spool fills, release the pawl, pull more slack through, and restart.
The user feeds the webbing back through the correct slots before rewinding. The operator lays the strap flat on the work surface. The user should loosen each twist and fold before rewinding. A hand runs along the webbing to confirm it lies straight. The user winds slowly and keeps the strap centered on the spool. The webbing must stay centered during the first two wraps. A crooked start creates another tangle.
The final test matters. The user pulls the webbing snug and re-engages the ratchet mechanism. The handle should click evenly as the teeth engage. This repair also helps users fix a handle that will not turn. A clean spool and flat webbing prevent future jams. These steps show how to untangle a ratchet strap safely and restore its full holding power.
Release a Ratchet Strap That Is Jammed
A jammed ratchet mechanism demands attention to the pawl system. Ratchet teeth have an asymmetrical shape: a gentle slope on one edge and a much steeper slope on the other. During forward rotation, the spring-loaded pawl rides up the gentle slope and drops into the valley between teeth. During reverse rotation, it catches the steep edge and locks. This normal tooth geometry explains why a pawl catches against the gear teeth when backward force applies while the pawl remains engaged.
Several conditions trigger this jam. Improper release technique leaves the pawl engaged. A twisted strap or stuck lever blocks movement. Debris, mud, sand, or ice physically lodges between the teeth. Rust and grime make the pawl stick. Bent ratchet parts or a damaged pawl can hold the mechanism in the locked position. Identifying the exact cause helps the user choose the correct repair path.
Free the Stuck Release Lever and Clean the Teeth
A stuck manual pawl often responds to gentle hand movement. The user pulls and holds the spring-loaded release tab toward the outer handle. This action lifts the handle pawl out of the gear teeth. Next, the user rotates the handle open to a full 180-degree flat position. The built-in cam then pushes both the handle pawl and the base pawl clear of the teeth. If the spool remains bound by excess webbing, the user gently wiggles or pulls the loose outer strap tail backward while holding the release tab open. This wiggle motion frees the jammed ratchet mechanism without stressing the metal parts.
Do not force the ratchet handle with hammers, pipes, or cheater bars. Ratchet handles are designed for manual hand operation. Forcing them can bend the frame or shear the pawls and gear teeth.
Once the lever moves freely, the user inspects the gear teeth. Dirt and old grease form a gritty paste that blocks the pawl. A clean, dry cloth wipes away surface debris. A small brush reaches into the tooth valleys. The user then applies the proper lubricant. The table below compares suitable options.
| Lubricant | Application | Caution |
|---|---|---|
| Silicone or PTFE dry spray | Spray into gear teeth, then work the handle several times | Avoid oil-based sprays; oil grabs grit and causes buildup |
| WD-40 or penetrating oil | Loosens rusted or stuck components | Wipe away dirt and excess lubricant afterward |
| Light oil | Wet all moving parts lightly | Keep grease out of the gear teeth themselves |
Dry lubricants work best because they do not attract dust. The user applies a light coat and works the mechanism by hand until the pawl moves smoothly.
Fix the Pawl Spring and Reassemble the Ratchet
A weak or broken spring cannot push the pawl back into the gear slot. The user opens the side plate carefully with a small screwdriver. Inside, the spring sits against the pawl. The user examines the spring for bends, cracks, or rust. A spring that has lost its tension needs replacement with the same type of spring. Users should not improvise with a stronger spring; the correct tension matters for safe operation.
If the spring simply shifted out of place, pliers reset it. The user positions the spring against the pawl body and confirms it rests in the groove. Then the user checks the pawl edge for nicks or rounded corners. A worn pawl cannot seat fully in the tooth valley. This condition causes slipping or repeat jams. Bent frame holes or a deformed axle also shift the pawl-to-gear angle. The user inspects these components before reassembly.
Reassembly follows the reverse order. The user places the pawl and spring into the frame, then fits the side plate back over the mounting pins. The screws or nuts tighten firmly but not with excessive force. The user then tests the handle action. A smooth click confirms the pawl engages each tooth correctly.
After reassembly, the user disengage the ratchet mechanism completely. Pulling the release lever should open the unit freely. The user then resets the pawl and tests again. This double check confirms the repair holds. If the pawl still catches or the strap is jammed after these steps, the internal parts may have unseen damage. In that case, replacement is the safer choice. A repaired unit must operate smoothly before it returns to service. The user also examines the webbing for fraying at this point. Fixing the mechanism only solves half the problem if the strap itself shows wear.
Test and Care for Your Ratchet Strap
A ratchet strap needs one final check before it hauls any load. A smooth lock confirms the pawl catches correctly. A clean release proves the mechanism opens freely.
Test the Lock Under Light Tension
The user pulls the webbing snug and re-engages the ratchet. He or she winds slowly to keep the strap flat on the spool. Fast winding creates a new tangle. The handle should click evenly as the teeth engage. Each click means the pawl drops into a new tooth. The user pulls the release lever afterward. The unit should open without resistance. The user repeats this cycle twice. A smooth action proves the ratchet mechanism works correctly. A grinding sound or a slip means the fix failed.
Never exceed the working load limit printed on the label. The manufacturer prints the exact rating on each product label. If the strap fails the light-tension test, repeat the repair. If the pawl still slips, replace the strap.
Store Straps Clean, Dry, and Untangled
Proper storage prevents the next jam. Dirt and moisture cause rust and mildew. UV light weakens the webbing. The table below lists proven storage habits.
| Recommendation | Prevention benefit |
|---|---|
| Clean straps before storing | Removes dirt and chemicals that degrade webbing |
| Air-dry completely before rolling | Prevents mold and mildew |
| Keep straps in a cool, dry place | Avoids moisture buildup |
| Store out of direct sunlight | Prevents UV damage that makes webbing brittle |
| Keep hardware on shelves, not the floor | Reduces ground-level moisture and rust |
After air-drying, the user rolls the webbing neatly around the ratchet and secures it. The user places the strap in a sealed bag. The bag blocks moisture and dust. The user keeps the bag away from salt, oil, and solvents. These chemicals corrode hardware and weaken fibers. The user applies silicone lubricant to moving hardware only. The user avoids the webbing. A clean, dry ratchet strap returns to service without rust or binding. This habit also protects the ratchet mechanism from gritty debris that causes stuck pawls.
A twisted or stuck ratchet strap is not automatically ruined. Identify the jam, loosen the strap, rewind the webbing flat, reset the pawl spring, and test the lock. Most ratchet mechanism failures respond to this simple repair.
Synthetic webbing with cuts, burns, knots, or worn stitching should be removed from service. A missing working load limit tag means the strap should not be trusted.
If the pawl slips after fixing, order a factory-matched ratchet and pawl set. A new pawl on an old gear can slip. Fix what you can, replace what you can’t, and always test before you trust it.
FAQ
Why does a ratchet strap tangle so easily?
The webbing twists when it enters the spool slot. It bunches against one side plate. The user must lay the strap flat and wind slowly. Keeping the first wraps centered prevents most tangles.
Can a jammed ratchet mechanism be fixed with lubricant?
Yes. A dry silicone or PTFE spray works best. Oil-based lubricants attract dirt and cause buildup. Spray the gear teeth, work the handle, and wipe away excess.
When should someone replace a ratchet strap instead of repairing it?
Replace the strap when webbing shows fraying, cuts, or worn stitching. Replace it when the pawl slips after repair. Damaged webbing should be removed from service. Order a factory-matched replacement from the manufacturer.
How does a user release an overwound spool?
The user pries the manual pawl release catch with a small screwdriver while holding the release tab. Then the user pulls the webbing backward. The spool spins freely.